*******
I do this as I proceed with my mandala creation. We can keep the number of layers to a manageable level, but retaining all layers between the various phases, so that any step can be changed or recreated as needed. This takes a lot of memory, but gives us a lot of flexibility.
*******
Label the new image as PH2 for phase 2. Now we will kick it up a notch. Let's create a ring of 8 blossoms. Select the flower you see here and positon it above the cross allowing some space in between.
*******
We could choose other numbers of flowers for our ring, but 8 is the easiest to work with and we want to ease you into this. We could create rings of odd numbers, but even numbers are much easier to work with, so I usually use rings of 8, 10 or 12 and multiples thereof.
 Duplicate layer, then go to edit>transform. You can rotate 180° or flip vertically. You could drag the duplicated layer to the bottom of the cross and it would be quick, but I usually use the arrow keys, because it maintains one axis of movement, which aides in positoning. So use the down arrow until you have your duplicate layer in positon. Use your grid lines to help in this.
*******
Select these 2 layers and duplicate. Rotate 90°C. Now select the 4 layers and duplicate. Go to layers>transform>rotate. Up in the tool bar, enter 45° in the angle box. Watch the magic. We now have a ring of 8 flowers. Click the check button in the tool bar to apply the changes.
*******
If the flowers overlap or don't have a symmetrical arrangement, then click on the cirlce with the diagonal slash in it to deny application. Go back and redo as needed. You may need to rescale the flowers up or down or positon closer to or further away from the center.
*******
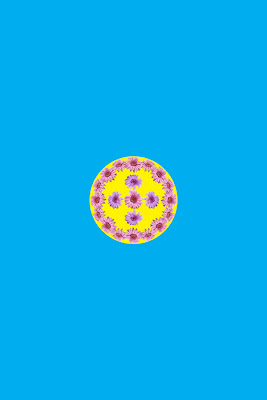
In this case, we have some pretty big gaps, so we are going to fill in with new blossoms and convert this to a ring of 16. Are you ready for this?
*******
At this point, we need to create a circle to use as a guide. I go to the shape tool and select the ellipse tool. By alt shifting from the center, I drag out until my circle just surrounds my ring of flowers. I have chosen yellow, but there are other choices. This layer can be hidden and won't show in our final image. It can also be expanded to serve as a guide for succeeding rings.
*******
Select a new flower and drag onto page. Position between the top flower in our ring and the one just to the left and roate so that it fits. We could scale these flowers down so that they don't touch or barely touch. We could also let this new flower overlap the first 2, but let's put this layer below the first 8 in our layers palette so as to position it behind the first 2. Our circle comes in handy in guiding our positioning of this flower.
*******
There are a couple of options here. We could rotate 180° and proceed as before with duplicating and rotating layers as with the first 8 flowers. I want to show you and alternative, however.
*******
Duplicate layer and go to edit>transform>flip horizontal. Use your right arrow key to position this flower just to the right of our top blossom. Now, we select the 2 layers and duplicate. Rotate 180° or flip vertically and move to bottom of the ring with the down arrow key. Select the 4 layers and duplicate. Rotate 90°. Now we have a ring of 16 blooms. Isn't this fun?

No comments:
Post a Comment